Greetings!
Let’s install the ZXBaremulator on the micro SD card!
On it’s site you don’t have much instructions… it’s not rocket science but you need to figure it on your own how to put everything working.
Basically, you need to have a micro SD card with Raspbian / Raspberry PI OS pre-installed (the easiest way to have a bootable micro SD card), or format the micro SD Card so that it becomes bootable.
If you already have a micro SD Card with Raspbian / Raspberry PI OS installed, you can jump to Step 2 – Partitioning the micro SD.
If not, please follow the instructions below.
Installing Raspberry PI OS with Raspberry PI Imager
- First Download Raspberry PI Imager
- Connect the micro SD Card to your computer (mine has a SD Card Slot, I use a micro SD to SD Card adapter, you might need an external SD Card Reader).
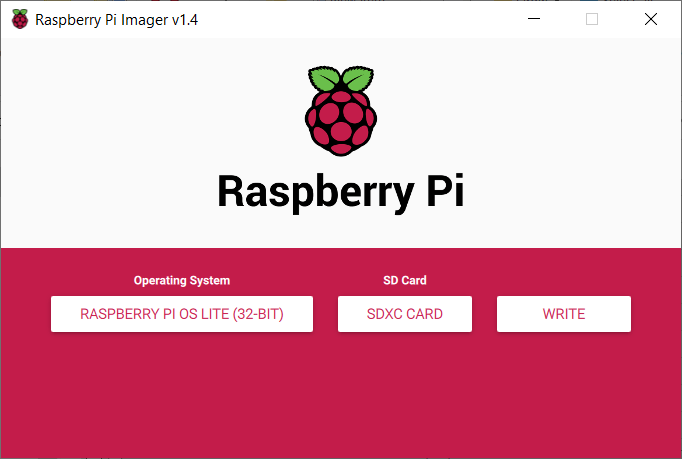
- Install Raspberry PI Imager, and Run it.
- Click “Choose OS” button and choose “Raspberry Pi OS (other)” and “Raspberry Pi OS Lite (32-bit)”.
- Click “Choose SD Card”, and Select your SD Card (in my case SDXC 64GB mounted as D:\).
Make sure you’ve really selected the correct SD Card Drive and Backed Up everything you need from the SD to your PC or external disk, all your data will be lost!
- Then, click “Write”. You’ll get a warning saying “All existing data on ‘XXXXX’ will be erased. Are you sure you want to continue?”, then click “Yes”.
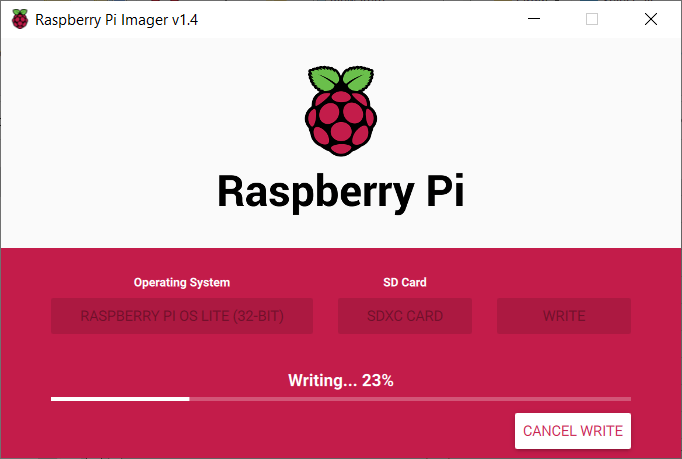
The Raspberry PI OS is being written to your SD Card. When it finishes, you’ll get the message:
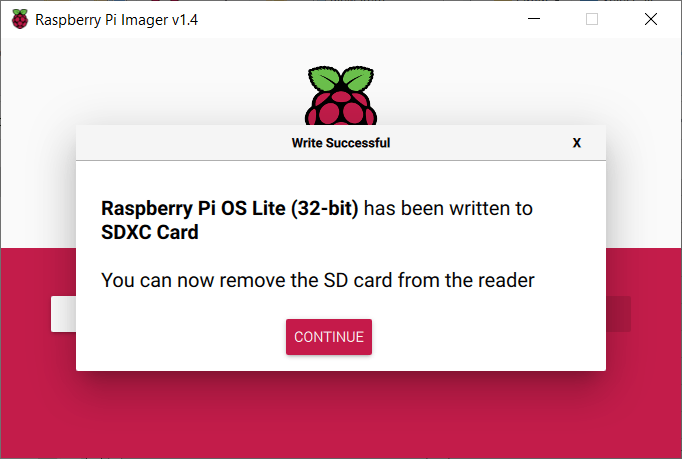
Click continue, close the Raspberry PI Imager application and then remove the SD Card from the PC.
After, insert the SD Card again. The PC will detect the SD Card and it’s new Boot Partition (named “boot”), that will contain all the necessary files to boot Raspberry PI OS, something like this in Windows File Explorer:
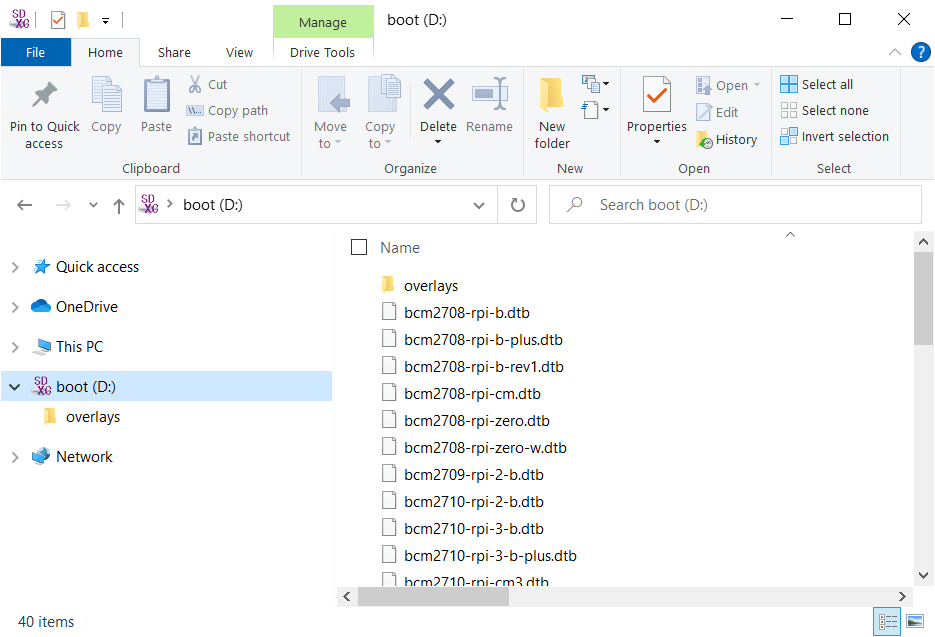
That’s it! You have now a bootable micro SD Card with Raspberry PI OS!
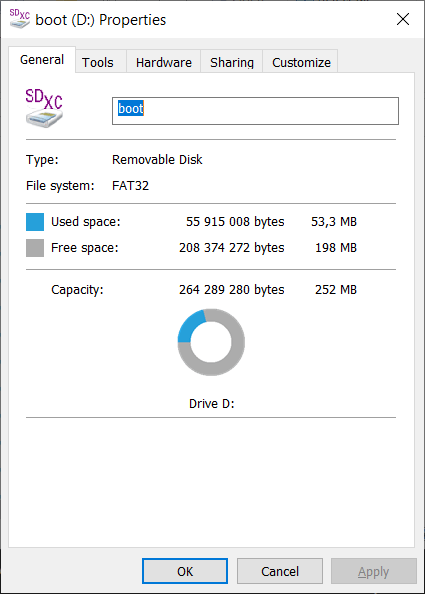
It’s a small FAT32 partition (256 MBytes), if you want to have present a few thousand games (there are lots of game roms for the ZX Spectrum in worldofspectrum.org), you’ll need more space than just 256MB.
In general, the 256MB will be enough to store your favorite games (and more), the game files are very small.
To continue the process, please jump to the next post, ZXBareemulator SD Install Step 2 – Partitioning the micro SD.
Cheers!